Find out how to connect an NFC reader to your VisitorBook Sign-In Terminal.
What do you want to do? #
- Assign NFC cards or fobs to visitors – connect the NFC reader to a staff terminal.
- Allow visitors to sign in with an NFC card – connect the NFC reader to a visitor terminal.
NOTE: If you are using two separate terminals – one for visitor sign in and one for staff actions (like running an evacuation) – you must first connect the NFC reader to a staff terminal to set up your NFC cards. Then disconnect the NFC reader (closing the app breaks the connection) and reconnect it to a visitor terminal.
What you need #
You will need:
- A sign-in terminal with the VisitorBook app installed and updated to the latest version available.
- Your Bluetooth NFC reader.
Steps to connect the NFC reader to the terminal via Bluetooth #
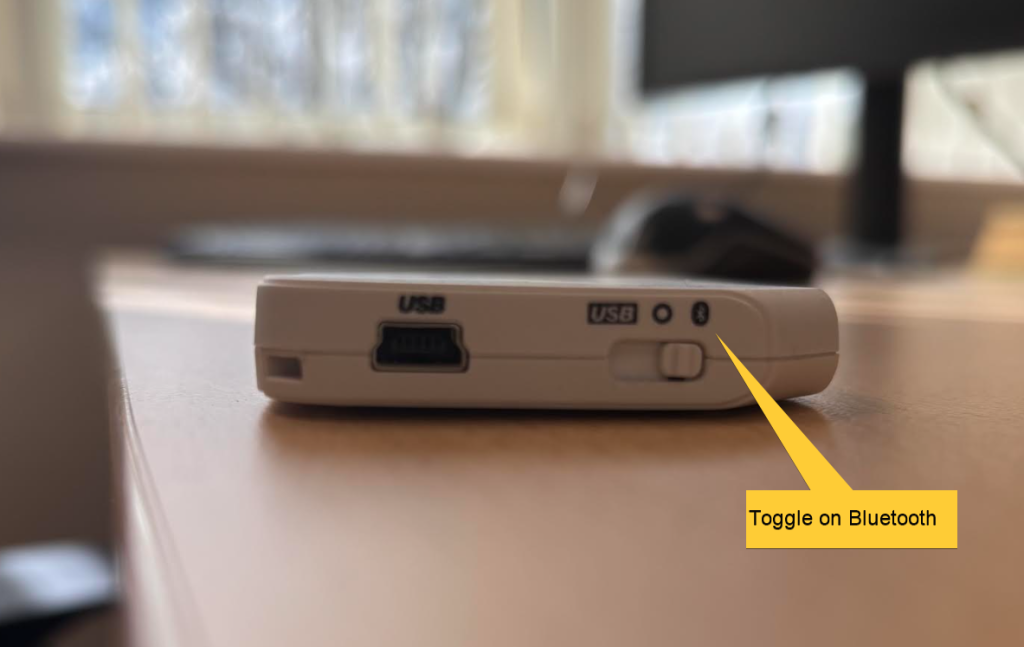
On the NFC reader:
- Look for a button on the top of the reader that allows you to toggle between USB or Bluetooth.
- Toggle the button on for Bluetooth. The NFC reader should flash to indicate it can be connected.
Important: To stay online, the NFC reader will need remain connected to a power source. This will be especially important if you use the NFC reader for visitor sign in.
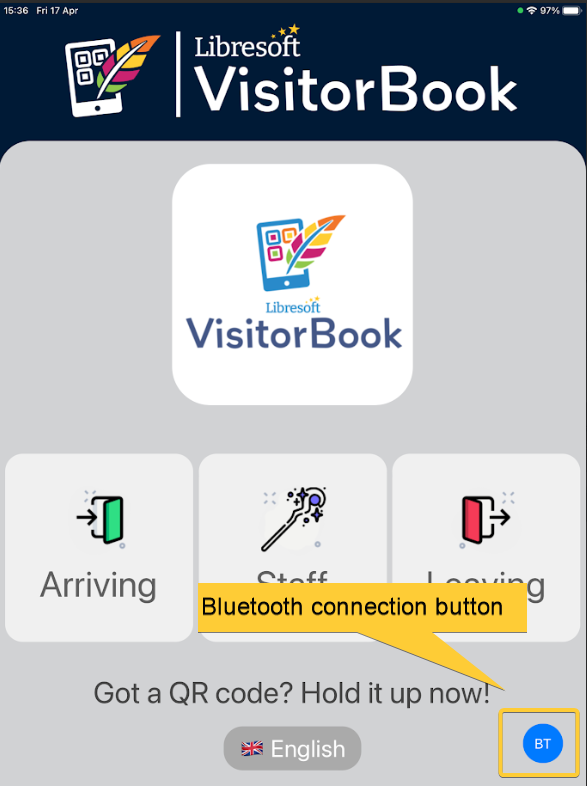
On your sign-in terminal:
- Open the VisitorBook app.
- Allow a Bluetooth connection, if prompted.
- Tap the BT button. It is located on the bottom-right of the Home screen.
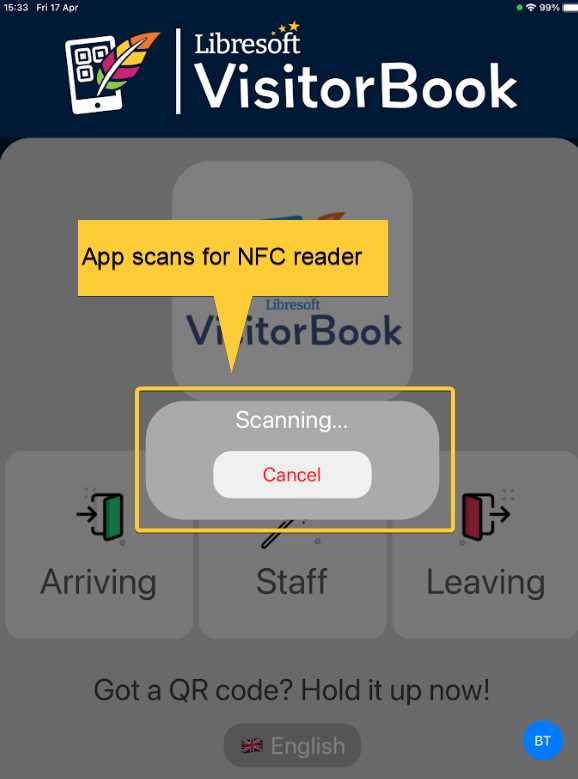
- A ‘Scanning’ popup appears.
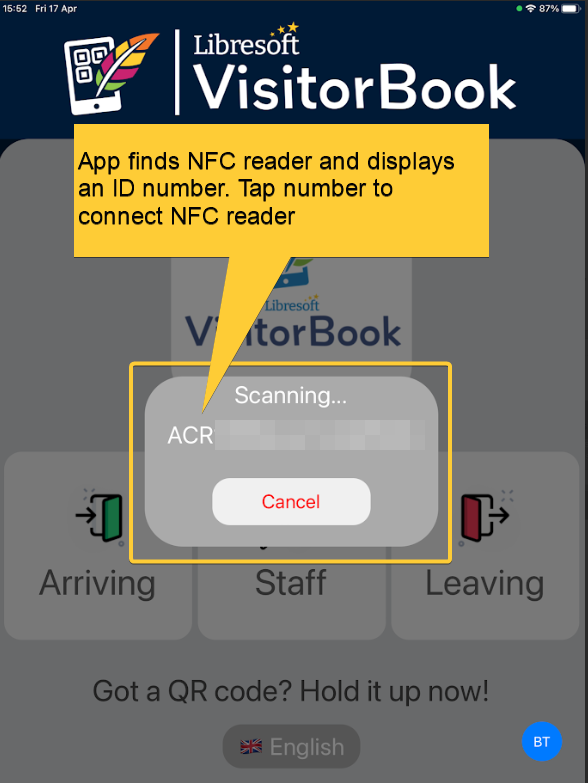
- When the app has found the NFC reader, you should see a code appear in the Scanning popup.
- Click on the code.
- The NFC reader is connected to the terminal.
Important: The NFC reader is only connected while the app is open. If you close or restart the app, you will need to reconnect the NFC reader. The NFC reader will also go online (and disconnect from the app) if it does not remain connected to a power source.
Tip: If the VisitorBook app cannot find an NFC reader, check whether the reader is adequately charged.
© Libresoft 2026