This guide gives you some tips on how to connect your label printer to your Wi-Fi.
Important:
- Some of the steps listed below will require you to have administrator rights on your device. You will also need to be able to access your network DHCP service. Depending on your organisation setup, you may need to enlist support from your IT Team or provider.
- We recommend you refer to the manufacturer’s instruction manual for hardware such as label printers.
- The guidance below links to the manufacturer’s website and software. Libresoft VisitorBook is not responsible for this software. Use of third party websites and software is entirely at your own risk.
Initial Setup #
- Once the printer has been turned on (press and hold power button for 1 second), set the current date and time.
- Once on the dashboard (date and time shown side-by-side), click Menu.
- Navigate to Template Settings, then click OK.
- Navigate to Template Mode and turn this to Off.
- Still in Template Settings, navigate to Confirm Print and turn this to Off.
- Go back to the Menu page, and scroll down until you reach WLAN. Set WLAN to On, then set Network Mode to Infrastructure Mode.
Device Configuration #
Phase 1: Install printer software
- On a laptop or desktop computer, download the following software: Printer Setting Tool and install it on your machine. You will need administrator rights to your device to install this.
- Open the installed Printer Setting Tool. If there is no shortcut for it, you can manually navigate to it here: “C:\Program Files (x86)\Brother\LabelMobile Printer\Printer Setting Tool\brutilch.exe”.

Phase 2: Note MAC address
- Plug the printer into your device via the USB cable and load up the Printer Setting Tool software.
- In the Printer field, the software should auto select the printer but if not manually change it to the correct printer model.
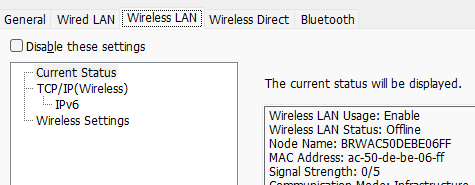
- Select Communication Settings, and then the Wireless LAN tab.
- Look under Wireless Status and grab/make a note of the MAC address. This is the unique number for the printer.
Phase 3: Add MAC address to your network
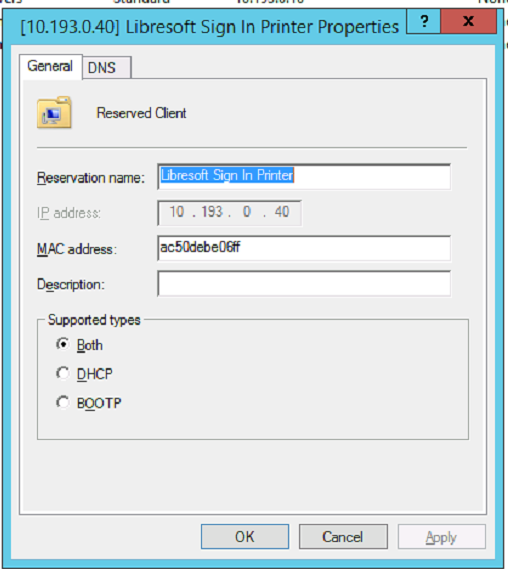
- Access the DHCP service on your network.
- Add the MAC address on a suitable IP address as a reservation (Note: the printer IP address should never change). This process can be different depending on how your network is managed – this is something your IT support may be able to help with. An example image of a DHCP Service on a Windows Server operating system is shown below.
Phase 4: Connect printer to Wi-Fi
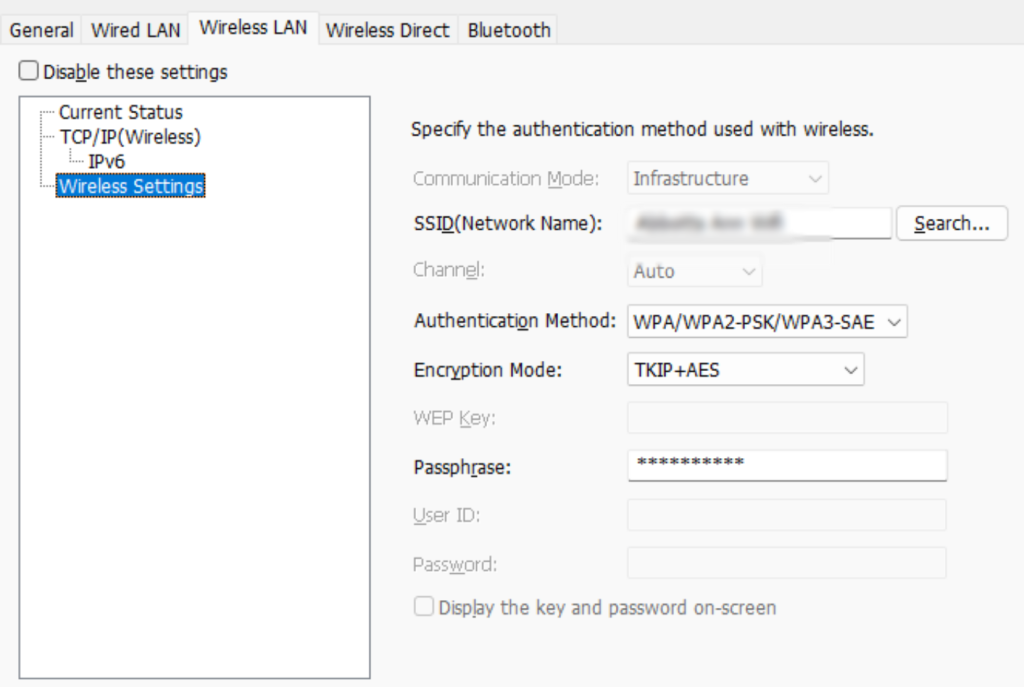
- Go back to the Printer Setting Tool software and navigate back to Communication Settings, and then the Wireless LAN tab.
- Select Wireless Settings and add in the Wi-Fi details by clicking Search, and selecting the Wi-Fi you wish to connect to. This must be the same Wi-Fi network to which the VisitorBook terminal connects.
- Click Apply at the bottom of the popup. This restarts the printer.
Phase 5: Adjust device settings using Printer Setting Tool
- In the main Printer Setting Tool, select Device Settings.
- From the Auto Power On menu, select On. This ensures that the printer is always on if it was powered off inadvertently.
- From the Auto Power Off (AC/DC) menu, choose None. This ensures the printer does not turn itself off due to inactivity.
- Select Apply and then exit the Printer Setting Tool.
Phase 6: Check printer has access to the network
- Enter the IP address of the printer in a web browser so you can confirm it has network access.
- Under the printer is the admin password for the printer. You may wish to add this to your records.
Phase 7: Add printer labels
- Add the labels into the printer. Please refer to the manufacturer’s instructions for this step.
- Press the Scissor button to make sure the labels feed through correctly.
Success! You have connected your label printer to the Wi-Fi.
© Libresoft 2025