If your plans go slightly awry, it’s simple to cancel an event and let people know.
There are two options for cancelling an event. Option 1 (from the Events page) is quickest. Option 2 (from the Specific Events page) allows you to review event details such as event attendees before you click that Cancel button.
Both options allow you to choose whether or not you send a cancellation alert to attendees.
Option 1: From the main Events page #
| Step | System Action | Notes |
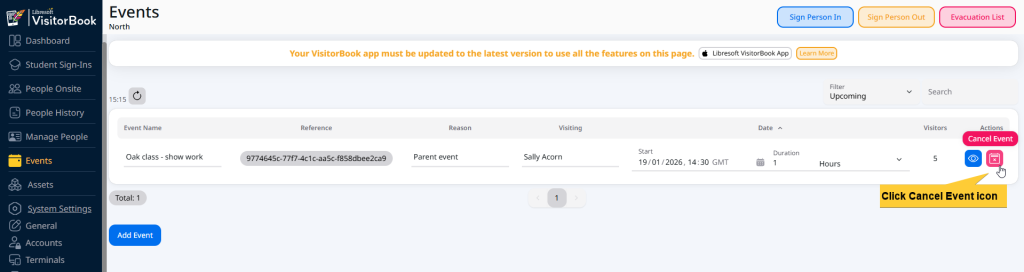
| Go to Events from the menu. | The Events page opens, listing all upcoming events. | |
| Find the event you want to cancel in the list. | ||
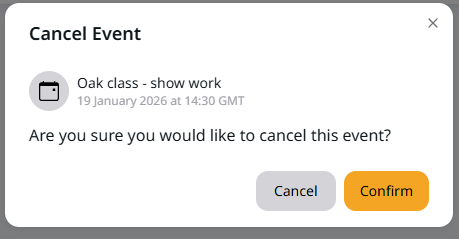
| Next to the event, in the Actions column, click on the Cancel Event icon. | The Cancel Event popup opens asking you to confirm whether you’d like to cancel the event. | |
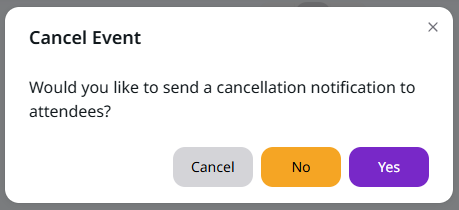
| Click the Confirm button to continue cancelling the event. | On the Cancel Event popup, the system asks you whether you would like to send a cancellation notification to all attendees. | The following steps vary depending on whether or not you choose to send a cancellation notification. |
| If (Step Taken) | Then (System Action) | Notes |
| You click ‘No’. You do not want to send the cancellation notification… | The system cancels the event. It is removed from the ‘Upcoming’ view on the Events page. | You can still send a notification later if you wish. Filter the Events page to show cancelled events. |
| You click ‘Yes’. You want to send the cancellation notification… | The Cancellation Email template opens. From here you can edit and send a cancellation notification. The system sends the cancellation email and cancels the event in the same transaction. The event is removed from the ‘Upcoming’ view on the Events page. |
Learn more:
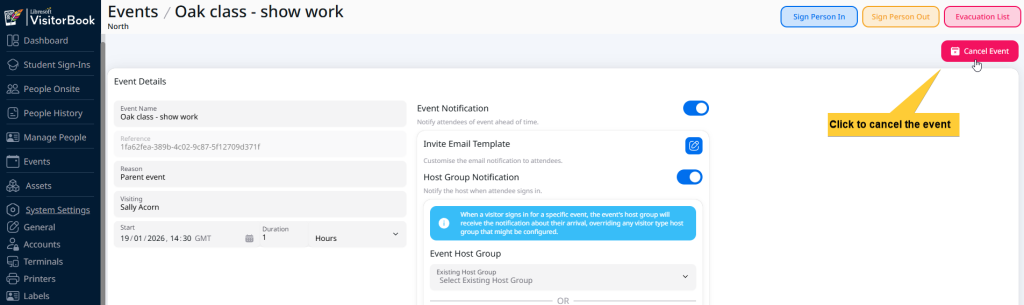
Option 2: From the specific events page #
| Step | System Action | Notes |
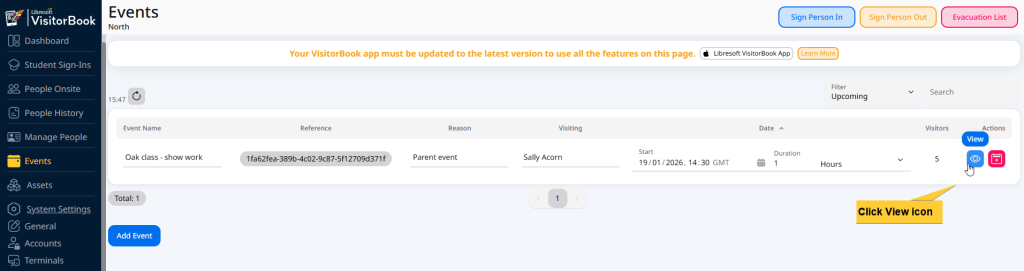
| Go to Events from the menu. | The Events page opens, listing all upcoming events. | |
| Find the event you want to cancel in the list. | ||
| Next to the event, in the Actions column, click on the View icon. | The page for the specific Event opens. | Here you can see more event details, such as the list of attendees, and edit the event notifications. |
| Click the Cancel Event button. | The Cancel Event popup opens asking you to confirm whether you’d like to cancel the event. | The Cancel Event button is located on the top-right of the page. |
| Click the Confirm button to continue cancelling the event. | On the Cancel Event popup, the system asks you whether you would like to send a cancellation notification to all attendees. | The following steps vary depending on whether or not you choose to send a cancellation notification. |
| If (Step Taken) | Then (System Action) | Notes |
| You click ‘No’ to not send the cancellation notification… | The system cancels the event. It is removed from the ‘Upcoming’ view on the Events page. | You can still send a notification later if you wish. Filter the Events page to show cancelled events. |
| You click ‘Yes’ to send the cancellation notification… | The Cancellation Email Template opens. From here you can edit and send a cancellation notification. The system sends the cancellation email and cancels the event in the same transaction. The event is removed from the ‘Upcoming’ view on the Events page. |
Learn more:
© Libresoft 2026